Okay, so today I really needed to bake bread. I thought, what better time than today when we are not busy to have my 11 year old Jeffery grab the camera and record the process. If you are a hesitant bread baker (cough, cough, KELLY, cough) hopefully this will give you a visual as you embark on this fun and really rewarding activity!!

Since I am such a student of The Pioneer Woman, I'll start with the ingredients. I have already posted them, so I won't go over it again, other than to say that the container with the blue lid is salt, the clear round container is yeast, and the big plastic container is my wheat flour. For your info, this was the King Arthur flour. Lastly, you can't make this bread without your sweetener and oil, so I have out honey and the last (sniff, cry, sniff) of my coconut oil. Time to order some more!
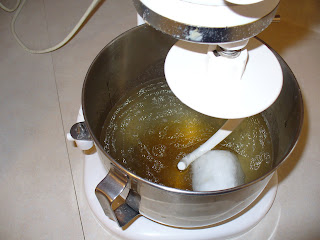
So, here is what it looks like with 6 cups of warm water, honey and a lovely blob of coconut oil.

Now I've sprinkled on the yeast...

and added in 5 cups of flour.

You can see, it is mixed, but it isn't smooth at all. That is okay.

This lovely mixture sat for a half hour while I whipped my son's tail at "Flinch". If you haven't played it, you should! Fun card game. But I digress.

Okay, here is my secret tool so that I do not forget to put in the salt! I put the salt on top of the flour container so that I cannot possibly add more flour without moving the salt! Works wonders for me, anyway!!

So, now, after 30 minutes, our mixture is lovely, large and bubbling like a boiling pot of water! I took a moment to have a mini science observation with my camera man, and then I got busy.

Ta-Da!!! The salt is added!
Okay, so now I have added most of the flour, and we are letting it go to knead. However, as you will see next.....

my mixer has some trouble with this volume of dough, and it climbs up the hook. I almost always finish it on the counter.
So, I flour my counter...

dump out the dough, still fairly wet,

and use my kitchen scraper thingy to flip it for me until it has enough flour in it to make it easier to manage.

I add more flour when necessary....
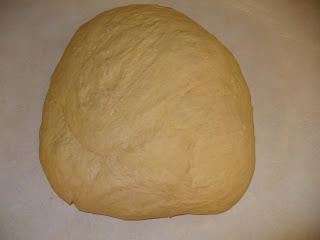
and voila!! A HUGE lump of bread dough!

Here is how you check to be sure your bread is ready. You should be able to pull a little lump of it a bit and make a "window pane" effect without it falling apart. This wasn't our best picture of it, but it was the best lighting!!

Now, for all you anal retentive bakers like me out there, this food scale creates peace of mind, and even loaves! We weigh it all, and divide by four!

Here are my lovely loaves...

and my lovely loaves rising!
30 minutes later, and having been slaughtered by my son/photographer at "Phase 10", we have.....

four lovely and unbelievably fragrant loaves of bread!

"You know you want to try making my mamma's bread!!"
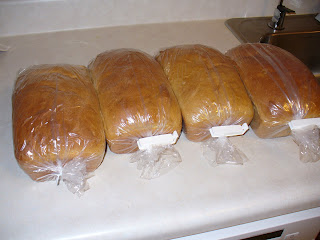
Once they are cool, I wrap them in plain old food storage bags, and freeze them. They thaw beautifully and are as fresh tasting as they can be!
Okay, so there you go! If you need help or some hands on tutoring, come on by on a baking day, and we'll roll up our sleeves! Happy baking!
Absolutely delightful! I can already smell and taste it! I think I need to go and bake some for our family! Thanks for sharing!
ReplyDelete